|
TennisOne Lessons
Optimizing Your Technique
By Nick Saviano
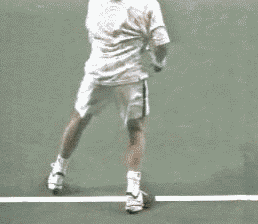
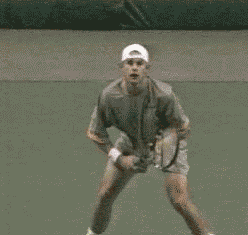
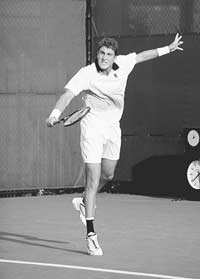
In Part 2 of this series excerpted from Maximum Tennis: 10 Keys to Unleashing Your On-Court Potential, Nick Saviano analyzes the true fundamentals of world class groundstrokes. (Click here for Part 1) For more information on ordering Nick's new book see below. You can have the prettiest-looking strokes in the world, but if you don't have sound fundamentals in moving to the ball and preparing to hit it, the rest of your stroke is a crapshoot. Good preparation will not only allow you to maximize control and power, it is also critical in enabling you to cope with the increased power in the game today. Ground StrokesThe fundamental techniques in preparing to hit a shot are the split step; the unit turn; movement to the ball (or tracking); racquet preparation, and stroke patterns. If you improve any or all of these areas, your level of play will improve considerably. Split StepThe split step is a vitally important technique a player uses to get her body in position to move to the ball in any direction as quickly as possible and it is one of the most basic fundamentals of movement on the tennis court. You should take a split step every time your opponent contacts the ball. A proper split step is arguably the most important aspect of footwork. Performing the split step at the correct time will establish your balance so that you are in a position to explode to the ball once you recognize the direction of the shot. In addition, it heightens your mental state of awareness at a critical time when the ball is coming off your opponent's racquet. This helps maximize your ability to anticipate what shot is coming.
The split step is performed by bending your knees, hips and ankles (all you need to think about is bending your knees, and your hips and ankles will bend naturally) and hopping into the air, which results in the actual lowering of your center of gravity as you land on the balls on your feet. The timing of the split step is crucial. Start the split step when your opponent starts to accelerate her racquet forward to hit her shot. Contrary to popular belief, your feet do not always land together on the split step. In fact, in most cases, your feet do not land together. What actually occurs is that you time the split step so you are in the air when the ball comes off your opponent's racquet and you are able to determine the direction the ball is being hit before you land. The result is that your foot farthest from the ball lands first, while your foot closest to the ball actually turns to point in the direction of the shot before it lands. This enables you to make an explosive first step to the ball. Most players do this stepping out action naturally and are unaware that they make this move. I suggest that you not make this stepping-out action - leave it to instinct. Rather I would suggest focusing on the timing of your split step.
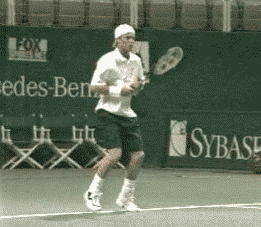
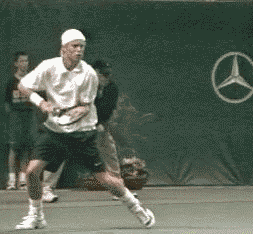
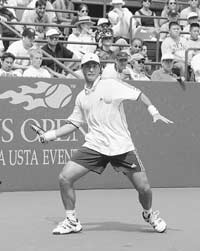
Unit Turn and Initial Racquet PreparationThe unit turn is generally the first move players make as they come out of the split step. The leg closest to where the ball has been hit turns and steps out in the direction of the ball while the upper body (shoulders and hips) begins to rotate. Contrary to what is often taught, you do not want to take your racquet back at this stage. However, the rotation of the shoulders along with a slight move back of the elbow of your racquet arm contribute to the initial racquet preparation.
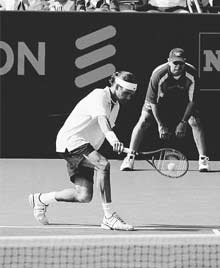
Movement to the Ball or TrackingAfter the split step and unit turn, your movement to the ball as you prepare to hit and after your recovery step to get back into position for the next shot is what I call "tracking" the ball. The key here is to maintain good posture--shoulders and back relatively straight with a slight bend forward at the waist--with minimal movement of your upper body and head. If you lose your dynamic balance and/or allow your shoulders and head to wobble or bob up and down excessively, it makes it almost impossible to track the oncoming ball properly. Also, good posture gives you the freedom physically to hit whatever stroke is necessary. A common mistake is to bend over excessively at the waist, which destroys your balance and restricts your ability to produce a quality stroke. As if you were a fashion model, think of balancing a book on your head as you move to the ball.
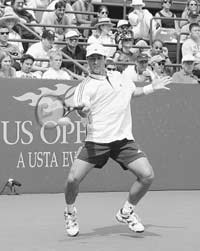
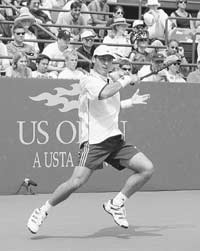
Muscle LoadingI know you have probably been told a thousand times to turn sideways when you hit the ball. But that is not enough because it will not produce adequate stretch--storing of energy in the large-muscle groups as you prepare to hit the ball. Focus on rotating your shoulders and bending at the knees. In actuality, you will be stretching or loading the large muscle groups--chest, shoulders, torso, hips, legs--without even realizing it as you prepare to hit the ball. This is absolutely critical to maximizing your ground strokes and return of serves, particularly when a ball is hit at you with great speed. When you rotate your shoulders, you want to feel the "pull" in your front shoulder. This is an important part of your racquet preparation because, once you get this "load," you'll automatically have taken about half your backswing with minimal movement of your racquet arm. Loading your muscles in this manner will also enable you to generate a great deal of power with a relatively short backswing. Here is a tip to help you accomplish this. To get a feel for the loading of your upper body, have someone feed you an easy ball. Before you step across to the ball, turn your upper body and bend your knees to prepare. You will immediately feel the loading process in your major muscle groups. Racquet PreparationAs you're preparing your racquet consider the following: backswing, stance, and hitting zone. Backswing. It is a myth that a player should take his racquet back first when he prepares to hit the ball. The point in time at which your hitting arm actually starts taking the racquet back varies with different styles of racquet preparation. However, the racquet usually does not move independently for significant distance until much of your rotation process is completed. Technically, the elbow of your racquet arm on the forehand will make a slight move back as your shoulder and hip rotation begins; however, it should feel as if your shoulders and hips are the only things turning at that time. Backswings vary tremendously from player to player. You can take the racquet relatively straight back, in a large loop, in a small loop, lead with your elbow, or use other motions. These are generally functions of style, not fundamentals; therefore, they won't be dealt with here. The main thing is to avoid extremes and to get a good rotation of your upper body.
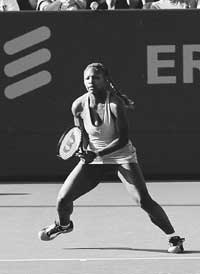
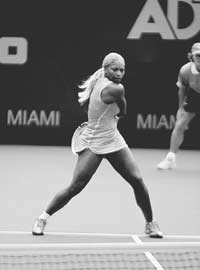
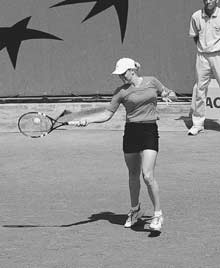
Stance. Three basic types of stances for all tennis strokes are open, squared, and closed. There has been a significant shift in the game toward the open stance on both the forehand and backhand. Here is a brief explanation of each.
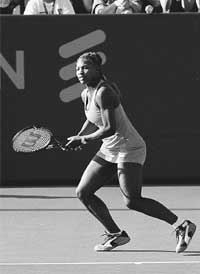
During the course of a match you will probably use all three stances. What stance you use on a given stroke will depend on your personal technique and the specific shot you are hitting. The point is to learn to use the stance that will help to maximize your shot. Hitting zone. The hitting zone is the distance away from your body that the ball is contacted. To develop consistent strokes, you need to establish your optimum hitting zone and consistently hit the ball in that zone.
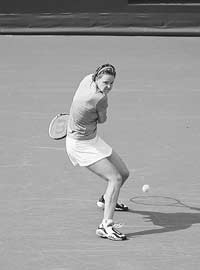
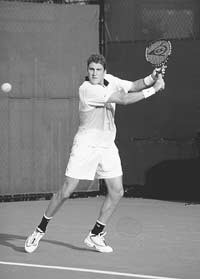
The actual contact point (how far out in front of your body you contact the ball) will vary depending on the type of shot being hit. However, your hitting zone should vary as little as possible. Basically, it should be a comfortable distance from your body that allows you to freely execute the shot. Remember, getting your body in the ideal location to contact the ball is the key objective of good footwork. Stroke PatternsThe position of the racquet head at contact is the most important element in a stroke. For most ground strokes, the racquet face at impact will be very close to vertical, give or take a few degrees. Adding spin to the ball has more to do with the path the racquet takes through the swing than with the opening or closing of the racquet head. For the standard drive or topspin ground stroke, the basic swing path of your racquet is a low-to-high, or upward movement through the hitting zone. The more topspin you want, the more extreme the low-to-high swing path. Some pros have as much as a 50-degree angle on their upward swing. Generating a lot of topspin requires a great deal of racquet acceleration upward through the hitting zone.
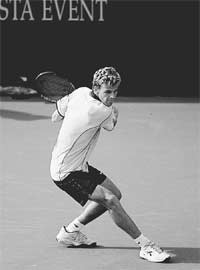
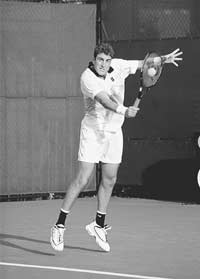
A high-to-low, or downward racquet motion through impact creates backspin or slice on ground strokes. You should start out slightly above the flight of the oncoming ball and swing in a down and outward path toward your target. Even though you might open the racquet face significantly as you prepare to hit and on the follow-through for the slice, at impact the racquet face is only slightly open. Follow-ThroughThe development of new racquet technology and the evolution of technique (grip changes, more spin, and the quest for maximum power) have increased racquet-head speed on all shots, which has profoundly affected the follow-through and how it is taught. The most important thing to remember about the follow-through is that, if you have a good swing path leading up to and through the hitting zone, the follow-through should come naturally. In short, it is the angle and the trajectory of the racquet head at impact that technically affect where the ball goes. The ball is on the strings for only about four milliseconds, which means it is long gone before you complete even a fraction of the follow-through. So, it stands to reason that the follow-through is not really important to the stroke or shot, right? Wrong! The follow-through is an important component on all strokes.
The follow-through is a great gauge to determine whether or not you are approaching the ball with the correct swing path for the stroke you are hitting. For example, players often say that to get topspin you must get over the top of or cover the ball as you hit. Actually, you are not getting over the top of the ball on the hit but are turning over the racquet face slightly after the hit as you follow through. But, by having this perception in your mind of covering the ball on the hit, it could actually be helping you to establish the correct swing path for the shot. So, even though the follow-through is not directly affecting the flight of the ball, it is in fact affecting the way you approach the ball.
A good follow-through also helps to prevent injury by minimizing strain on your arm and shoulder. Here are a few suggestions:
Your comments are welcome. Let us know what you think about Nick Saviano's article by emailing us here at TennisONE.
As a professional player Nick was ranked in the top 50 in singles with wins over many top ten players. A master USPTA professional, his articles have appeared in many major publications, including Tennis Magazine |
|||||||||||||||


 Nick Saviano is the author of Maximum Tennis: 10 Keys to Unleashing Your On-Court Potential, and one the leading coaching educators in the world. The former director of coaching education for USA Tennis High Performance, Nick has worked with many young players who have gone on to be among the best in the world, and is a highly sought after speaker for coaching conventions worldwide.