| TennisOne Lessons Training an 8-Year Old: Part 2 David W. Smith, Senior Editor TennisOne In this continuing series on the training of an 8-year-old (my daughter, Kyla), over the course of this year, I will be discussing our initial training patterns and the philosophy behind each. In addition, I will be discussing Kyla’s perception of tennis and how she is relating to the developmental processes she is going through.
As mentioned in my first article, (The Training of an Eight Year-old), the process I have developed is called the “Advanced Foundation.” The Advanced Foundation teaches methods that do not need to change for the player to reach advanced levels of play. We focus on grips and swing patterns that, while providing the foundation to hit advanced strokes, allow players to evolve and personalize the game, embellishing stroke patterns that contribute to their own feel, strategy, and personality instead of having to change grips and specific strokes to move out of levels of elementary play. Training Kyla over the past four months has been personally enjoyable and certainly rewarding for both her and me. She has surpassed my expectations in both progression and performance. She has embraced tennis and knows she is making progress. Her enjoyment stems from both the physical associations she has when she hits a shot well to the type of "games" we play when working on techniques and the fun of doing something with her dad. Every game is dedicated to promoting some aspect of the foundation. This is not to say that all kids will enjoy the game as she does. I don’t presume to expect all kids to take to tennis and/or stick with it and I don’t expect all kids to stay in any of our programs.
But, this article will not focus on the philosophies of tennis as much as providing you the steps that I employ with all our students, using my one-on-one training with Kyla as a guide or template for teaching kids and beginners alike. Over the course of this series, I think the progression and Kyla’s improvement will help parents and instructors determine if the methods I use are helpful and/or productive. Remember, learning to become a skilled tennis player is not age dependent. While certain methods may change between a child and an adult, like the amount of time spent and diversity of games, the foundation and drills or progressions work with all ages!So, let’s get started. Foundation: Where to start? I started Kyla out in the same way I start all beginners (adults and juniors alike), with the continental grip. I have found the ability to gain comfort and familiarity of the continental grip is a key component to skilled play in many areas. This grip is, without question, the dominant grip used by top players for the serve, volley, overhead, the two-handed backhand (the dominant hand’s grip) as well as things like the slice backhand and the drop shot. I have found that players who start with eastern grips or start developing groundstrokes as their first learning element, have much more difficulty learning the continental grip.
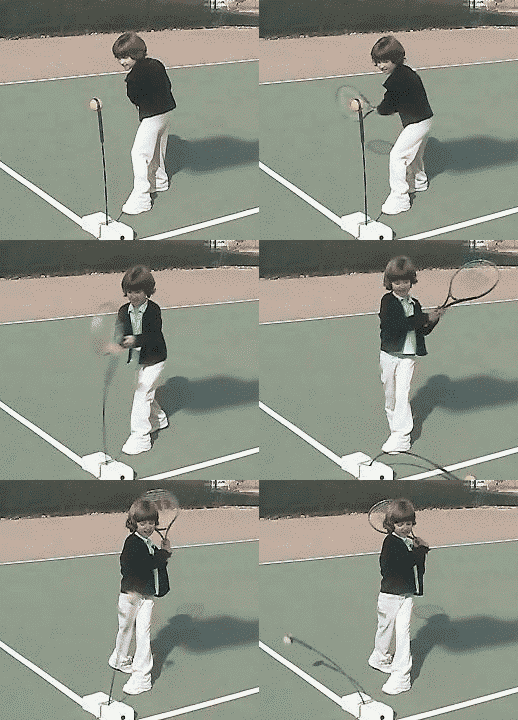
With Kyla, being her parent, I had the opportunity to do things here at home before we ever headed to a tennis court. Using toy racquets, I introduced Kyla to holding the continental grip and blocking foam balls to me when she was about 5. We spent very little time on this, maybe a total of 15 minutes over the course of a year. I also taught Kyla the two-handed backhand and two-handed forehand at that same time using the PracticeHit, a device that allowed her to practice the swing path using the correct grips. This device also helped her develop the element of timing by hitting a ball that was coming towards her. However, because the ball is on a fiberglass shaft and oscillates back and forth instead of the ball being hit somewhere, Kyla did not have to manipulate her swing to try and hit the ball to a target, as so many beginners will do. In fact, this concept of trying to hit a tennis ball (with directional intent) with a tennis racquet too soon—before a player has developed a proper stroke pattern—is one of the main reasons so many kids and adults fail to develop optimal strokes and end up often with goofy looking, unreliable swings. Because of the unfamiliarity of hitting topspin (swinging a racquet with a low-to-high swing path), beginning players will manipulate a swing to meet their perception of how to hit a ball over the net. Thus, it will save a ton of time, if not years of frustration, by developing a proper swing pattern first, without using a tennis ball.
Off-court Volley Drills It isn’t a bad idea at all to record these on a large chart for your child or student. This sets up a fun way to practice these drills and the player will look forward to them as a way to shoot for new high scores! (Rewards for hitting set numbers is always a fun way to excite players, too!) Up Bounces One of my favorite drills is one of the simplest. The drill focuses on the use of the continental grip, a firm, straight hitting arm, and the player’s hand-eye coordination to keep the ball bouncing up on the center of the strings. The act of bouncing the ball on the strings with the palm facing down simulates the arm, grip, and wrist positions for the backhand volley. (Albeit, in a vertical aspect instead of a horizontal one.) Down Bounces
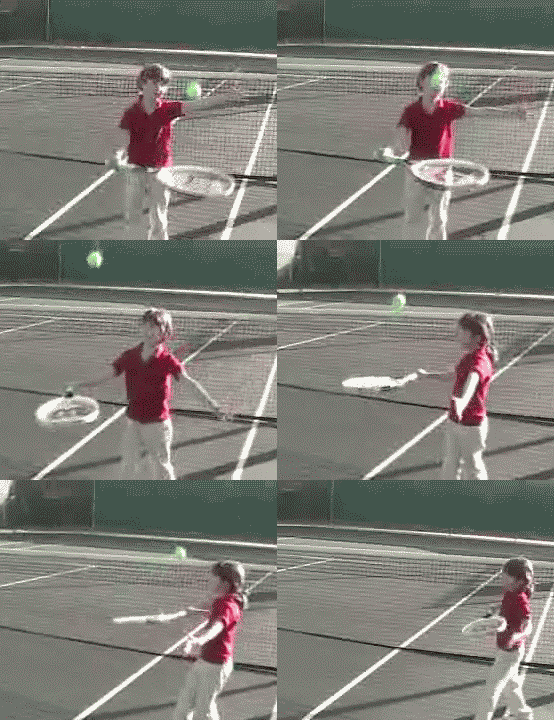
Another drill that focuses on building familiarity of the continental grip, this time kneeling down and bouncing the ball down on the ‘forehand’ side of the racquet, simulating like the previous drill, the basic grip, wrist, and arm position for hitting forehand volleys. Kneeling down helps players keep the continental grip and helps keep the racquet level with the hitting arm. (As opposed to standing up to do this drill, which encourages players to move to the eastern forehand grip.) Down Catches This is the practice of ‘catching’ a falling object, such as a bean bag or a tennis ball (as players get the feel for it), and holding it on the strings as it falls. A player tosses up the ball or object several feet above their head and then attempts to bring the racquet down at the same speed the object is falling, catching it as if it were a water balloon or an egg you didn’t want to break as you catch it on the strings of the racquet. Tip: Hold the racquet high, come down with the object and don't try to touch the object until it is about waist high. Again, focus on holding the continental grip and work on the finesse of soft hands and racquet control. Volley with Bean Bag
This drill, while I’m sure others have thought of it, was first suggested to me by my assistant, Wayne Bullock. As a way to help beginners get the feel of finding and blocking the ball for the volley, have them try and catch a bean bag on the strings as if they were going to hit a volley. I like to start all my drills with the harder ones first, hence we start with the backhand volley. Similar to the Up-Bounces, hold the arm straight and firm, racquet head held up with a firm wrist, and, of course, using the continental grip. We follow this up with the forehand volley ‘catch’; using the continental grip, keeping the elbow closer to the body and racquet head up, Kyla is working on finding the ball and holding the catch position. The toss and block drill is one of my favorite volley drills for many reasons. The drill can be done with incredibly large numbers of players on the court. I have conducted several clinics with over 100 players on the court. The toss and block drill can be adapted to teach not just volleys but half-volleys as well as groundstrokes in a productive, yet controlled, environment. In addition, the aspect of tossing the ball works on the timing for beginners and even the tossing player is working on subtle things like aiming (tossing to the partners racquet), tracking the ball as it comes off the racquet, and trying to catch it. And as a partnership, you can create little competitions between teams of two players to see who can do the most without dropping or missing a ball.
I recommend the tossing player step with the opposite foot of their tossing hand as this simulates the footwork for a forehand even as this player is only tossing the ball. The blocking player, the one with the racquet, is focusing on finding the ball, holding their finish, and making corrections in their aim as they gain control of the ball as they catch it on their strings. A slight underspin action is desired but not critical at this point. I try not to have players hit volleys flat for many reasons: flat volleys will come off harder than a ball with underspin; flat volleys tend to reflect downward off a flat racquet; advanced volley patterns usually employ underspin for a variety of reasons. The faster you can get beginners to feel the underspin action, the faster they will develop an advanced volley. Remember: It is Not "Out in Front!" The phrase, "hit the ball out in front" has been used for eons by teaching pros. The concept of the phrase is to help players not hit late. However, the interpretation of this phrase can, and often does, lead players to hit some shots wrong.
The volley, for example, is not generally hit in front of the body towards the net. When a player turns sideways, then yes, the racquet is held out in front of them, but, this is not out towards the target. When players reach towards the net to make contact with the continental grip, the racquet opens up too much. This is one reason so many players resort to using eastern grips on their volley. The eastern grip requires a player to hit out in front of them because the racquet must be laid back relative to the forearm. The continental grip will lay the racquet more parallel with the forearm and when the player turns sideways, the racquet is already square to the ball. When players demonstrate consistent control and execution of the volley in all the previous drills, then, and only then, do I then begin to hit balls to them on the court. And the first drill I work on is the angle volley drill. It dawned on me years ago that nearly all teaching pros, myself included, would start beginners out by hitting balls to them from the middle of the court and have them hit back to the middle. When I observed those players who had not progressed much in the volley areas, it was in the inability of these players to hit significant angle volleys. While the eastern grips severely limit the ability of players to hit severe angles on their volleys, I noticed that even players who had learned to use the continental grip seldom explored angle volleys. It can be argued that one of the components of advanced volley play is the ability to hit angle volleys in competition when the right situation offered it. Backhand Angle Volley Drill
In this drill we are emphasizing the ‘set and hold’ principle. This phrase, one I coined years ago, describes a player "setting" the angle of the racquet before the ball gets to them. After contact, the player then "holds" the finish. One of the biggest faults I find with beginners and even intermediate players in controlling the volley is the fact that they start with the strings pointed well away from the target prior to contact. This means the player will have to swing the racquet around just to get the racquet to be in position to hit the ball to a desired target. The "hold" concept stresses that after contact, the player will want to hold the racquet in this same position. While players will elongate the follow-through as they become more advanced, beginners learn a great deal about aim and, more importantly, creating a repetitive, reliable stroke pattern for each and every volley. In addition to the backhand angle volley, I move to the forehand angle volley with the same concepts and focus of form - finding the ball and learning how to hit a significant angle on the volley.
Inside Out Volley This is the volley that is hit on the inside part of the court to an angle out wide. Like the angle volley just discussed, teaching pros often neglect the practice of this angle too. I like the inside out volley as it helps players learn to wait for the ball better and learn to use the angle of the racquet to direct the ball to the desired target. Often players like to reach for the ball. This drill teaches them the consequences of reaching with the hand forward to hit a volley. (As with almost all shots, remember to reach with your feet, not with your hand!) Remember that avoiding more challenging techniques simply because they are hard won't help players develop. Yet, breaking down the learning patterns that utilize proper grips and strokes allow players to master them in time. In most all of these drills, we also integrate some element of playing the drill as a game which I will expand on more in the next article in this series. Next month, I will also highlight the groundstroke progression I am taking with Kyla as well as the overhead. Your comments are welcome. Let us know what you think about Dave Smith's article by emailing us here at TennisOne .
TENNIS MASTERYFinally. a resource that unlocks these mysteries: • Why do m • Why are making changes in one's game so frustratingly difficult? • What tennis teaching methods are disruptive or detrimental to player progression? Read David W. Smith's TENNIS MASTERY and learn not just how to avoid playing at mediocre levels, but how the best players in the world Master the sport of tennis! "With a depth of knowledge and fresh perspective, TENNIS MASTERY is set to become a manual for tennis instructors and a measure for tennis literature." Richard Wigley, Director, Kayenta Tennis Center, Ivins Utah. Take in David Smith's 30 plus years in the tennis teaching industry. This 335-page manual will provide for every level of player as well as support for all tennis-teaching professionals, a blueprint for reaching higher levels of tennis mastery. Order TENNIS MASTERY at tenniswarehouse.com , or go to tennismastery.net for exciting excerpts from the book and a host of tennis information! And check out David Smith's other articles found here at TennisONE.com |

 illions of tennis players stagnate at levels far below their potential?