
Private Lessons: The Serve
by Scott Murphy
|
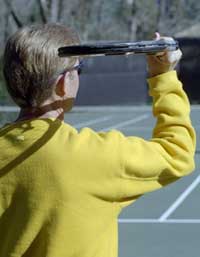
Without a service grip, you’re doomed to the “waiter’s” delivery. It may
work fine when serving martinis, but it won't deliver power and spin. |
It’s generally accepted that the serve is one of the two
most important shots in tennis (the other is the return of serve), because
it starts every point, and is the only shot not dependent on how the ball
is delivered off the opponent’s racquet.
As in all the strokes, learning the fundamentals is
imperative if a player is to achieve consistent placement, depth, spin,
and power. Having confidence in one’s serve is something that can really
set a player apart. To serve well takes many hours of repetitive practice,
but the rewards are well worth it, and remember you don’t need a partner
to do it.
On my teaching court and at my Nike Tahoe Tennis Camps,
(Click here for info). I see many of the same service mistakes over and
over. The next two articles will identify them and discuss what can be
done to remedy problems. In this article, I’ll talk about the grips, the
hitting arm, and the tossing arm.
The Grips
Let’s start with the grips. Plain and simple, there are
just too many players using eastern forehand and even semi-western grips
when serving.
For the novice or the unschooled veteran, these grips
feel supportive, but invariably using them leads to the “waiter’s
position.” It’s called that because it appears as though the player
is
supporting a tray of food with the racquet prior to swinging at the ball.
In other words, the wrist is laid back and the elbow
points down. This places the racquet head parallel to the ground.
From here, all the player can do is hit a flat,
straight-ahead ball with very little margin for error. When players try to
hit the ball hard, this serve never goes in. Under pressure, all too often
it
leads to a dink or what I call the “granny tap” serve.
The correct service grips are the continental (the initial
grip to learn), and for some players, even the eastern backhand.
But the
rub in learning the service grip is that for most players, their first
attempts result in mishits and or serves that are overly sliced.
Consequently, the continental grip is dropped and the old reliable,
one-dimensional serve reappears.
So players reach a plateau with the old serve. They chose
not to deal with the limitations, simply because of the immediate lack of
results. This is criminal! Half the battle is just allowing the grip to
feel more natural over time. The reality is this could be no more than a
couple of practice sessions away!
|
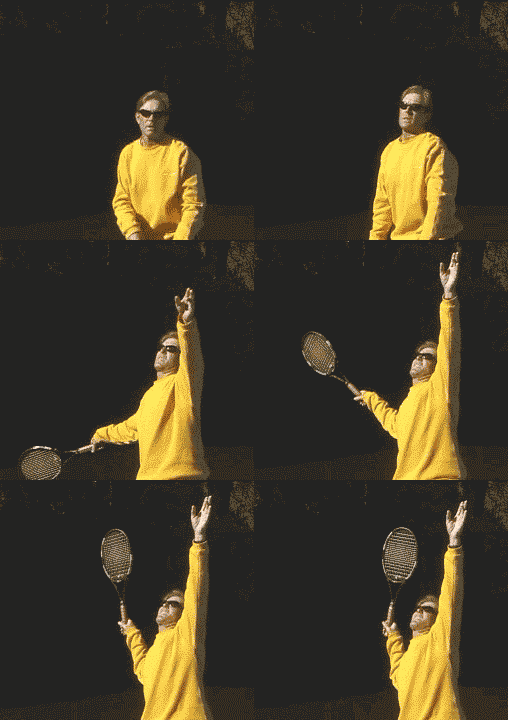
The backswing and movement to the cocking position. |
The Racquet Path
The second half of the battle is to have a clear
understanding of the path the racquet must travel relative to that grip
change.
Taking only your hitting arm into account, there are
four movements it should make when serving:
- The cocking position
- The racquet drop
- The upward swing to the ball
- The follow through.
Using the continental or eastern backhand grips
facilitates all of these movements.
To initiate the backswing some players let the racquet
head drop while others will lift it straight up. This is strictly a matter
of preference but either way two things are imperative.
 |
 |
|
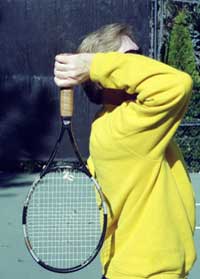
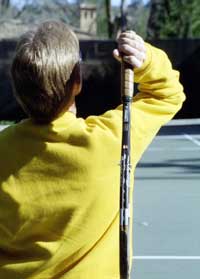
Two views of the racquet drop. Note the
racquet is perpendicular to the back—but definitely not scratching it. |
The first is that
the racquet face stays closed (an open face on the takeback will force the
elbow into a permanently low position).
The second is that at the conclusion of this phase, the
tip of the racquet is straight up and on edge (hitting surface parallel to
the side fence).
This is the cocking position. At this point the elbow is
bent creating a “V” formation from the shoulder, to the elbow, to the
hand. This cocking of the racquet is a part of what’s called the “trophy
position” that I’ll discuss in more detail in part two.
The cocking position automatically begets the next phase,
the racquet drop. As the elbow is driven forward and upward, the racquet
head responds by dropping straight down more or less perpendicular to the
back.
|
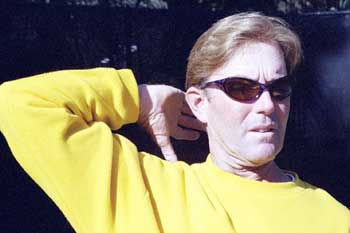
A good way to set the racquet in the drop position is to visualize
touching your thumb to your shoulder. |
Another way of accomplishing this is to imagine touching
the base of your thumb to your hitting shoulder from the cocked position.
You won’t actually touch the shoulder but the elbow is automatically
driven up and out.
From here the racquet begins its rapid ascent to contact. This is the upward swing to the ball. This is where it can get tricky and
discouraging for the uninitiated. There’s great incentive here though,
because this movement, when correct, provides the serve’s single greatest
power source.
When the movement is right there is, an internal rotation
of the shoulder as the racquet is driven upward. This is followed by
pronation of the forearm and an outward rolling of the wrist through
impact.
|