|
TennisOne Lessons
Establishing the Contact RangeIt is important to note that the catalyst for the
forward swing (and the back swing) is the correct contact range. Nothing
hinders your game more than failing to meet the ball comfortably out in
front of you. This is what prompts the timing of the take back and forward
swing. If done correctly, the entire process will be perfectly continuous,
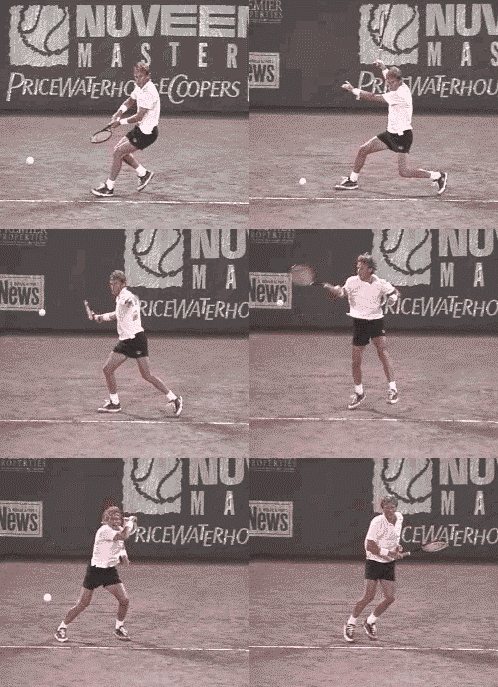
as seen in the Bjorn Borg animation. Notice how his forehand stroke flows
from start to finish. Finding the most effective contact range for your
forehand (or any stroke) will come through experimentation in practice,
and the realization that your own sense of balance and leverage is your
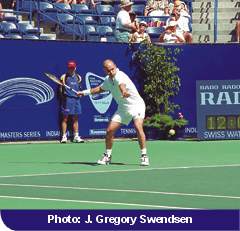
best guide. Whether you are using an open stance or square
stance on your forehand, make sure to create an “avenue” through which
you make your forward swing. For the square stance step OUT to the ball,
stepping across the body (closed stance), will prevent proper hip The Wrist and Arm Position
The moment before the forward swing begins it is
essential to lock your wrist and elbow in position. Lay the wrist back at
an approximately 90 degree angle to the forearm, and bend the elbow so
that another 90 degree angle is formed between the forearm and the upper
arm. Maintaining this position to the point of impact and well beyond is a
must, because it steadies the racquet head as it collides with the ball.
The key to maintaining the locked in position is “to let the handle lead
the strings”. It’s as if the butt of the handle and the heel of your
hand are combining to pull the racquet head through the contact point and
on into the follow through. If you’re truly locked in and the BACK of
the wrist initiates forward movement of the racket wherein the strings
lead the handle, it’s likely you’re hitting late. All the more reason
to work on that range of contact! More about that wrist break
later… The Role of the Non-dominant ArmAs the hips, trunk, and shoulders begin to rotate
forward, make sure to keep your shoulders perfectly level to make a
steadier more even swing. When striking the ball, the plane of your
shoulders should be level and facing the target; however, one deterrent to
this I often see is improper movement of the non-hitting arm. That arm has
the role of “pace car” to the hitting arm’s role of “race car”,
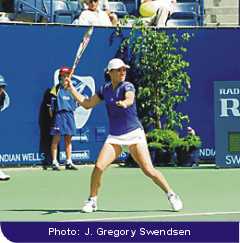
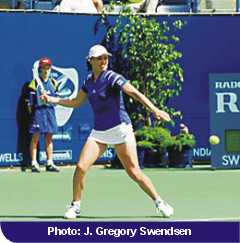
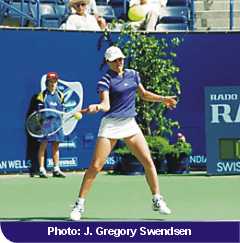
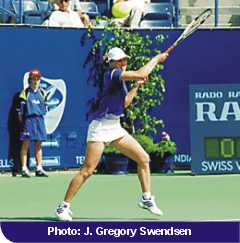
and in the process they should work commensurately. Notice in the sequence
of Martina Hingis, how well synchronized her arms are from start to
finish. I’ve seen so many players unaware of their non-hitting arm
flying up in the air, or dropping like a lead weight and staying there, or
scissoring across the body having started too far to the left (for a right
hander), as well as other variations. These are counter productive to
overall balance and can cause the racket to be out of sync with the force
provided by the elastic action of the trunk.
The Follow Through
Finally, and I can't stress this enough, follow
through, or in other words, HIT THROUGH THE BALL! I often see players end
their swing prematurely (at the moment of impact), creating a floppy
wristed finish. The fact is, a good deal of the swing takes place after
the ball is hit, and so “following through” means driving the racket
head well beyond the impact point. This will provide power and
consistency, because pulling the racket ALL the way through the stroke
prevents unwanted wristy errors. Your comments are welcome. Let us know what you about think Scott Murphy article by emailing us here at TennisONE. Scott Murphy is one of America's top teaching pros. He is the director of the Nike Tahoe Tennis Camp. He has taught privately in Marin County, California for twenty years. A high level senior player, Scott has been ranked numerous times in both singles and doubles in Northern California. Scott is already well known to TennisONE readers for his great "Ask the Pro" answers.
|
Last Updated 6/1/00. To contact us, please email to: webmaster@tennisone.com TennisONE is a registered trademark of TennisONE and SportsWeb ONE; Copyright 1995. All rights reserved. |
||||||||||||

