By John Yandell
Go to Part
1 Part 2 Part
3 Part 4 of the Visual Tennis
Series on TennisONE
(Click
here to see a complete, animated sequence of the backhand hitting arm
position.)
The critical moment in any tennis stroke is the contact point. For the ball to be struck so it both clears the net and lands in the court, the racquet head must be in a precise position (for example, vertical or very close to it on a topspin drive).
The single most important factor in achieving this racquet head position in the position of the hitting arm, yet in the vast lexicon of tennis tips this factor is rarely recognized or discussed. In the last article (Part 4) we saw the distinctive hitting arm position for the classical forehand. For the one-handed backhand, the role of the hitting arm is probably even more critical.
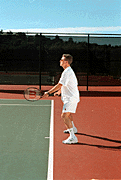
If we look at still photos of top players with one-handed backhands, players with classic strokes such as Ivan Lendl, Stefan Edberg, or Pete Sampras, we see the hitting arm is always straight at the contact, with the wrist locked. This position is vital to make contact in front of the body and create leverage on the ball with the shoulders and legs.
If you do careful still-frame analysis of the great one-handed backhands, you see that the arm straightens out several frames before the contact point, regardless of the shape or the size of the loop on the backswing. This same straight arm position is maintained throughout the course of the follow-through.
Unfortunately, the way most players are initially taught to hit the shot, virtually guarantees they will never achieve this critical hitting arm position. This is because of the common emphasis on starting the motion with an independent looping motion. The biggest problem for the average player on the one-hander is the elbow lead, the tendency for the arm and elbow to arrive in a bent position at the contact point before the racquet head. This results in late contact, the loss of real power or control, and all too often, tennis elbow.
In fact if you watch a player like Sampras in slow motion you will see that, rather than initiating the stroke with the loop, the first move is always a unit turn with the body--a sideways step combined with the shoulder turn. This move automatically takes care of half or more of the racquet preparation.
To eliminate the elbow lead and develop a solid one-handed backhand drive, the average player should imitate this move. The unit turn should be combined with a small additional straight backswing. This positions the hitting arm in the correct hitting position at the completion of the preparation.
From this turn position there is no internal arm motion on the foreswing and nothing to go wrong--the arm and the racquet move forward together through the contact to the finish. Follow the three key positions shown below and you will develop an effortless, powerful one-handed backhand drive.
By using the unit turn and the straight backswing, you will also develop a natural, compact elliptical loop. This is something your body already knows--how to change the direction of an object in its hand--such as your racquet. The model below describes the key positions to move the hitting arm and racquet through to execute the stroke. The simplicity of this model will allow you to develop the stroke pattern very quickly.
For each position, follow the checkpoints and establish the position physically. Now close your eyes and create a detailed mental image of the checkpoints--how each position looks and how it feels. This gives your body the direct visual and kinesthetic information it needs to master and execute the model.
As you work to develop the stroke, visualize the image of the straight hitting position with the checkpoints as you prepare, and then through the course of the swing. You'll be amazed how easy and solid this core element will make the stroke feel, even if you've struggled with an elbow lead for years.

![]()
![]()
![]()
(Click here to see a complete, animated sequence of the backhand hitting arm position.)
- End of Part Five -
Send email to the author
We encourage you to email your comments (pro, con, appreciative, whatever) directly to the author. To send email to John Yandell, click here.
To see John Yandell's Pro Tennis video series, go to: http://www.protennisvideo.com
Back to TennisONE Home Page
What's New | Tennis
Lessons | Tennis
in Your Area
Tennis Fitness | Tennis
Products | Sponsors/Advertisers/Consultants
TennisONE© is a trademark of TennisONE© and SportsWeb ONE©.
Copyright© 1995. All rights reserved.
<% ns_puts [nsv_get mkm_includes mkm_oldContentFooter_inc] %>