By John Yandell
Go to Part
1 Part 2 Part
3 Part 4 Part
5 of the Visual Tennis Series on TennisONE
(Click
here to see a complete, animated sequence of the backhand slice hitting
arm position.)
In the last article we saw how to
achieve the critical straight hitting arm position on the one-handed drive
or topspin backhand. The role of the hitting arm is just as important when
hitting slice with one hand. If anything, players tend to have even more
internal arm motion trying to hit down through the ball to generate underspin.
If you examine every good slice backhand in slow motion you will see that
the hitting arm is always straight at the contact. The slice is generated
by the angle of the racquet face moving through the line of the shot. TennisONE
has an animation of one of the purest examples of good technique on the
slice drive--the backhand
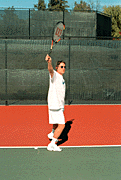
of the great Ken Rosewall. Check it out and notice how his hitting arm
straightens out well before the contact, and stays in the right hitting
arm position through the technical finish of the stroke.
The following progression is designed to teach you how to develop these
same core elements yourself. As with the topspin drive, your goal should
be to set up the hitting arm in the correct position at the completion of
the turn. If you master this position you will naturally develop a compact
loop to change the direction of the racquet when you start the foreswing.
Trying to create an independent looping motion tends to create the
dreaded "elbow lead' in which the elbow and the hand arrive at the
contact before the racquet head. This results in late contact,
loss of power, and control, and unfortunately, sometimes is the cause of
tennis elbow.
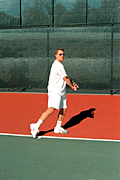
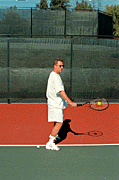
The difference in the turn position compared to the drive is in the angle
of the racquet face. The racquet face is set open about 30 to 45 degrees
and raised or lowered to the height of the ball. This same position, with
the hitting arm locked at the wrist and elbow and the racquet face open
is then maintained throughout the stroke. This means the arm is straight
with the racquet face open at the contact point and at the finish.
The result is natural slice. Visualize the ball as an orange and the
open racquet face as a knife blade. As the racquet comes forward, the knife
cuts through the diagonal back third of the orange imparting natural underspin.
For each position, follow the checkpoints and establish the position physically.
Now close your eyes and create a detailed mental image of the checkpoints--how
each position looks and how it feels. This gives your body the direct visual
and kinesthetic information it needs to master and execute the model.
As you work to develop the stroke visualize the image of the straight hitting
arm and of the knife and the orange. By changing only one key, the angle
and height of the racquet face, you will be able to go back and forth between
topspin and slice--the other core elements stay the same.


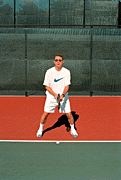
The unit turn will do most of this racquet preparation and only a small
additional movement is needed. The hitting arm is straight and goes straight
back so that the racquet hand is positioned in the middle of the back leg.
The racquet face is open about 30 to 45 degrees and set to the height of
the oncoming ball.


(Click
here to see a complete, animated sequence of the backhand hitting arm
position.)
- End of Part Six -
Send email to the author
We encourage you to email your comments (pro, con, appreciative, whatever)
directly to the author. To send email to John Yandell, click
here.
To see John Yandell's Pro Tennis video series, go to: http://www.protennisvideo.com
Back to TennisONE Home Page
What's New | Tennis
Lessons | Tennis
in Your Area
Tennis Fitness | Tennis
Products | Sponsors/Advertisers/Consultants
TennisONE© is a trademark of TennisONE© and SportsWeb ONE©.
Copyright© 1995. All rights reserved.
<% ns_puts [nsv_get mkm_includes mkm_oldContentFooter_inc] %>