<% ns_puts [mkm_getnavbar] %>
Visual Tennis Part 12:
Hitting Arm Position on the Serve

 By John Yandell
Go to Part 1 Part 2 Part 3 Part 4 Part 5 Part 6 Part 7 Part 8 Part 9 Part 10 Part 11 of the Visual Tennis Series on TennisONE
This series has focused on the critical role of the hitting arm in developing and executing classical strokes. Nowhere is the position of the hitting arm more controversial, less understood, or the subject of more bad advice, than on the serve. As outlined in the previous articles, the Visual Tennis stroke patterns for groundstrokes and the volleys are based on simple, unchanging hitting arm positions set up at the completion of the preparation. On the serve, the hitting arm position is constantly changing over the course of the swing pattern. This makes a clear understanding of its role far more difficult and complex. The problem is compounded by the speed of the racquet head on the serve, which is significantly higher than on any other stroke. The internal hitting arm position not only changes, it is moving faster. These combined factors make its true position harder to observe.
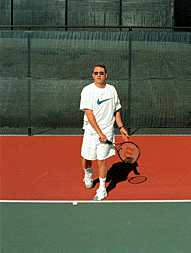
 At the completion of the racquet
drop, the tip of the racquet points directly down so the shaft of the racquet is
perpendicular to the court. The edge of the racquet falls along the player’s back
right side. Note the high elbow position. All effective backswings deliver the racquet to
this full drop position. If your racquet drop is restricted, alter the shape of the wind
up to conform more closely to the circular backswing pattern as shown in the animation. At the completion of the racquet
drop, the tip of the racquet points directly down so the shaft of the racquet is
perpendicular to the court. The edge of the racquet falls along the player’s back
right side. Note the high elbow position. All effective backswings deliver the racquet to
this full drop position. If your racquet drop is restricted, alter the shape of the wind
up to conform more closely to the circular backswing pattern as shown in the animation. |
Probably the most universally accepted "tip" on the service motion is to "snap" your wrist at contact for power and spin. You see this advice all the time in the tennis magazines and in television commentary. In reality, detailed high speed video analysis of the great players—or players with good serves at any level--reveals that the wrist plays no role significant in moving the racquet to the contact. It does not "snap," or break at contact. Let me repeat that: The wrist plays no significant role in the serve. If the wrist releases at all, this occurs long after the ball has left the strings either as a relaxation response, or due to the effects of gravity as the racquet travels down toward the court on the follow-through. But the motion happens so fast, the naked eye can’t follow. When we see the wrist break, we assume this must be happening at the hit. This is why high speed video is necessary in understanding the true bio-mechanical sequence. If, like most of us, you have been laboring under the tyranny of this common misperception about the role of the wrist, your serve may have reached only a fraction of its potential. In the extreme case, focus on the supposed wrist action may have prevented you from developing a reliable delivery.
 The dual motions of the hitting
arm and racquet have taken the player to the contact point. The arm and elbow have
extended through a triceps extension so contact is at full extension. The forearm and the
palm of the hand have also rotated from the player’s left to his right about 90
degrees, bringing the face of the racquet into solid contact with the ball. There has been
no wrist snap. The wrist remains in line with the forearm. The dual motions of the hitting
arm and racquet have taken the player to the contact point. The arm and elbow have
extended through a triceps extension so contact is at full extension. The forearm and the
palm of the hand have also rotated from the player’s left to his right about 90
degrees, bringing the face of the racquet into solid contact with the ball. There has been
no wrist snap. The wrist remains in line with the forearm. |
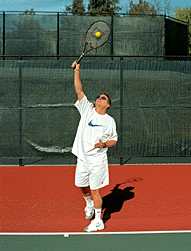
When studying video of the great players such as Pete Sampras, we discover the path of the racquet from the racquet drop position to the contact is complex, involving two separate, related motions. But neither involves the wrist. The first is a triceps extension, which straightens the arm at the elbow so the racquet can reach full extension. The second, simultaneous motion is the rotation of the forearm and the palm of the hand from the left to right, as the racquet moves forward and upward to the ball. The best way to visualize the combined action of these two movements is in terms of the palm of the hand. At the racquet drop, the shaft of the racquet should point straight down at the court, falling along the server’s back right side. From this position, imagine the palm of the hand is actually the face of the racquet. To make contact, the palm must now move upward and forward, extending from the elbow, AND also rotate about 90 degrees from left to right. This dual motion brings the racquet face to the ball producing solid contact. With a continental grip, this dual action will naturally cause the racquet to approach and strike the ball on an angle, again from the left to the right, generating spin automatically.
 A smooth relaxed
finish position means natural racquet acceleration and power. Pronation occurs
naturally after contact, but the racquet head continues out through the line of the shot
and all the way across the body, with the palm flat or in line with the front leg. Focus
on the image of bringing the palm of the hand squarely to the contact, and then all the
way through the motion to effortlessly maximize rhythm and power. A smooth relaxed
finish position means natural racquet acceleration and power. Pronation occurs
naturally after contact, but the racquet head continues out through the line of the shot
and all the way across the body, with the palm flat or in line with the front leg. Focus
on the image of bringing the palm of the hand squarely to the contact, and then all the
way through the motion to effortlessly maximize rhythm and power. |
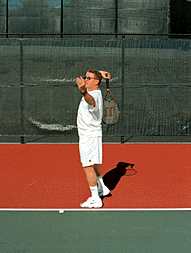
The finish of the motion should be full and relaxed. Visualize the image of the palm of your hand continuing across your body, so the palm ends up facing, or even touching down on the front of your left or front leg. If the motion from the racquet drop to the contact is correct, the racquet face and the palm will continue to turn from left to right after the contact, until, at the most extreme point, they actually face the right side fence. This effect, called "pronation," happens naturally as a consequence of the correct motion. Attempting to force or exaggerate this natural effect can result in a limited follow-through, and a stiff or awkward motion that may increase your chance of injury. The key is the action of the palm, rotating and extending from the drop to the contact, and then continuing out through the line of the shot and crossing to the front of the left leg.
As a natural consequence of the motion, the wrist may release or break, at a point roughly halfway through the follow-through, so that or the racquet is at a downward angle to the court in comparison with the rest of the arm. As with pronation, it is a consequence of a good motion, not a cause. Let it happen if it happens. Focus on the finish point of the motion with your palm ending in line with the front leg.
 Watch the path of the hitting
arm, as it traces a circular backswing to the racquet drop. The palm of the hand takes the
racquet to the contact. The forearm extends upward from the elbow, and the palm rotates
from left to right. The finish is relaxed and full with the racquet hand finishing across
the body in line with the left leg. Pronation has occurred naturally and automatically as
a consequence of this full relaxed motion. Watch the path of the hitting
arm, as it traces a circular backswing to the racquet drop. The palm of the hand takes the
racquet to the contact. The forearm extends upward from the elbow, and the palm rotates
from left to right. The finish is relaxed and full with the racquet hand finishing across
the body in line with the left leg. Pronation has occurred naturally and automatically as
a consequence of this full relaxed motion. |
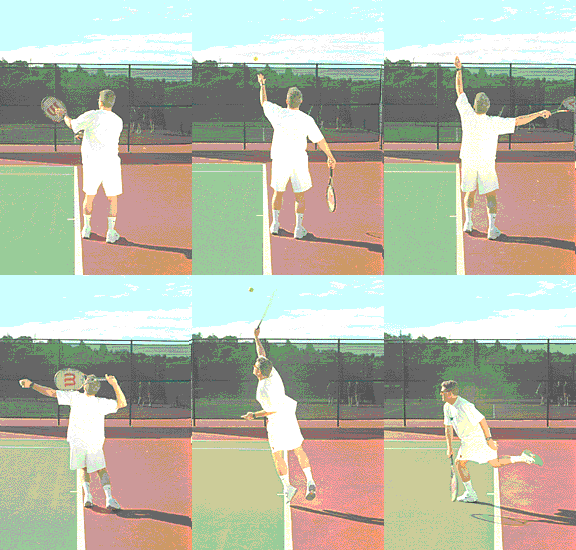
A final debated point regarding the hitting arm in the service motion is the shape of the backswing. In the pro game you see a great variety of shapes. The one thing the different backswings all have in common is that they deliver the racquet to the full drop position. Some players, such as Pete Sampras, keep the elbow bent throughout the windup. Others like John McEnroe or Mark Philippoussis, straighten the arm at the elbow as the arm and racquet start back, so they point in a straight line directly back at the back fence. This creates a more circular motion. In effect, the tip of the racquet traces the partial circumference of a circle before the elbow bends again and the racquet falls naturally into the full drop position.
Most players below the highest levels will find this circular wind up a much easier path to a full racquet drop. If you have trouble reaching the full drop, try altering your backswing to a more circular shape. The circular wind up is demonstrated in the animation. Notice how the palm and racquet face naturally turn over, so the palm faces the side fence to the player’s right as the arm and racquet move through the wind up.
As with all the Visual Tennis patterns, the key to mastering the hitting arm position on the serve is to internalize the imagery (imagine how the position looks and feels). The verbal descriptions are only a guide to help develop this deeper visual and kinesthetic experience. To develop this feeling for the hitting arm position, you should create the drop, contact, and finish positions physically as shown in the still photos. Now create an internal mental image of how the positions look and how they feel. Now, close your eyes and practice the motion. Imagine the key positions as a series of blueprints, and let your actual arm and racquet pass through the images. Open your eyes and begin actually hitting serves. Your eyes are on the ball. Use your mind’s eye to imagine the hitting arm positions you’ve developed. Over time you’ll find your motion will conform to the model. More importantly, you should be maximizing the effectiveness of your service delivery in competition.
Last Updated 9/1/98. To contact us, please email to: webmaster@tennisone.com
TennisONE is a registered trademark of TennisONE and SportsWeb ONE; Copyright 1995. All rights reserved.
